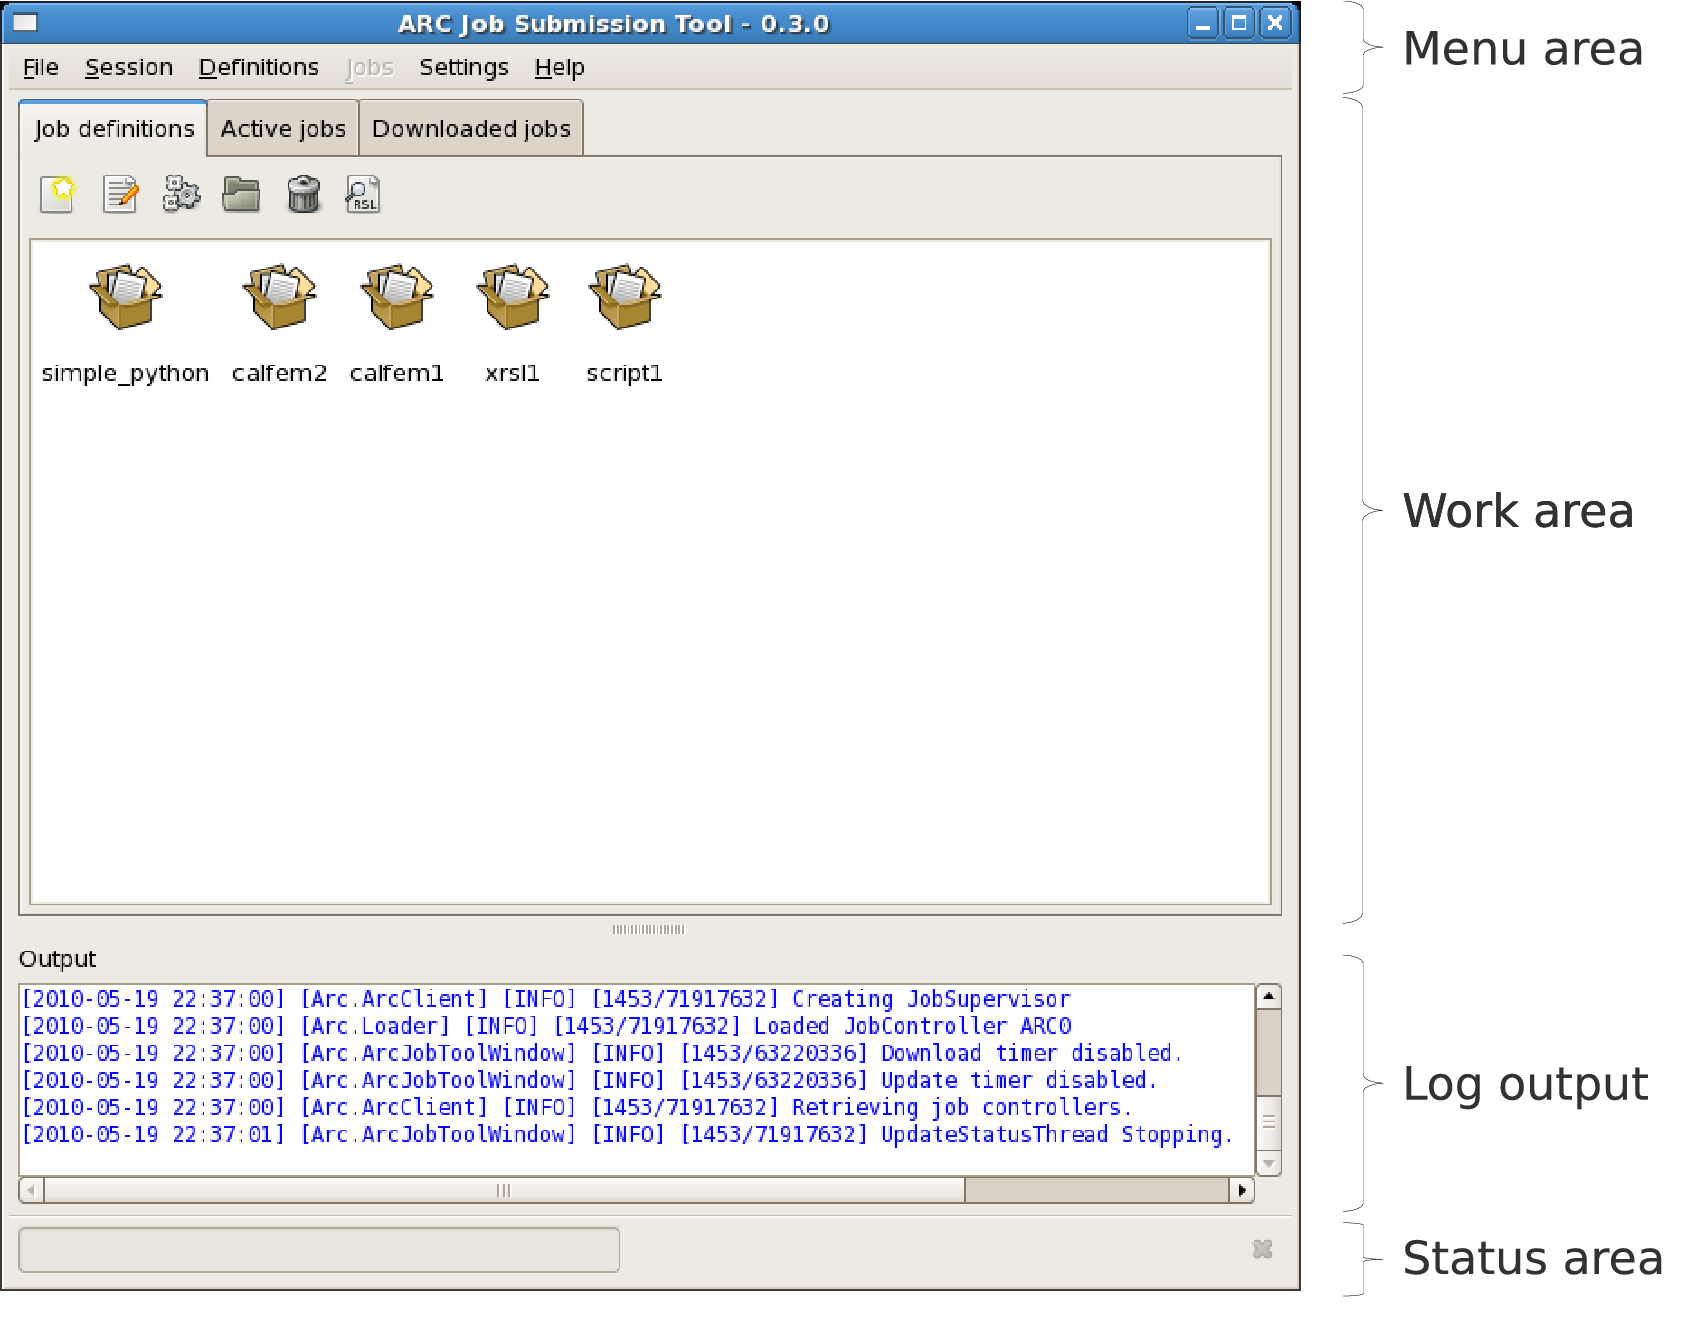
The design of the arcjobtool user interface is based on a tabbed window design. Currently there are tabs for Job Definition, Active Jobs and Downloaded Jobs. In the job definition tab the job definitions can be created and managed. The Active Jobs tab shows a view of the currently running grid jobs and enables the users to manage and download finished jobs.
The arcjobtool application attempts to implement a fully non-blocking user interface, no operation will lock the user interface. This is especially important when dealing with Grid operations, that can take a while to process.
Main Window
The main window is divided into 4 parts, menu, workarea, log output and status area. From the menu all the functions in the user interface are available. In the work area the user can switch between the main operating modes of arjobtool using the tabs. The log output displays log messages mainly from the ARC library, but also messages from arcjobtool. In the status area, status information is displayed from long running tasks. The sizes of the the work area and log output area can be changed by dragging the splitter bar up and down.
Client settings
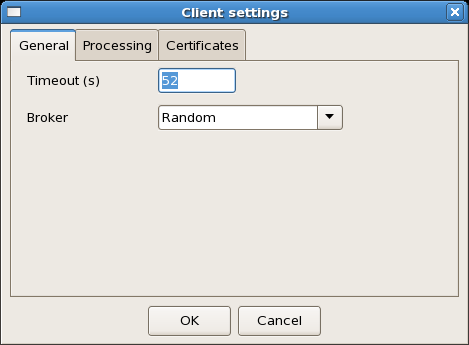
Client settinsg controls the user specific options in arcjobtool. The settings dialog can be show by selecting Settings ‣ Client.... The dialog is divied in 3 sections, General, Processing and Certificates. The tabs are described in more detail in the following sections.
General
In the General tab the client timeout and default broker can be specified. The client timeout value determines the amount of time the ARC client should wait on any given resource before giving up. To shorten the submission time the timeout value can be reduced.
The broker setting determines which brokering algorithm that should be used when submitting jobs. The “Random” broker is set as the default broker for the arcjobtool. Random chooses randomly between available submission targets. For more options see the ARC 1.1.x documentation.
Processing
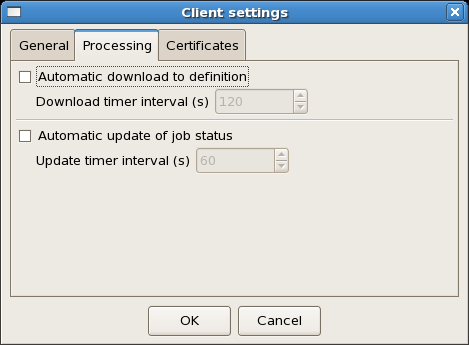
The settings in the Processing tab controls the automatic processing functions in arcjobtool, automatic download and automatic update of job status.
The checkbox Automatic download to definition determines if arcjobtool should check for finished jobs at given intervals and initiate download threads for these. The Download timer interval control determines at what intervals the check should be performed.
The checkbox Automatic update of job status determines if arjobtool should automatically update the status of active jobs. The Update timer interval control determines at what intervals the job status should be updates.
Warning
Don’t set too short intervals in the processing settings as this can produce a lot of network traffic.
Certificates
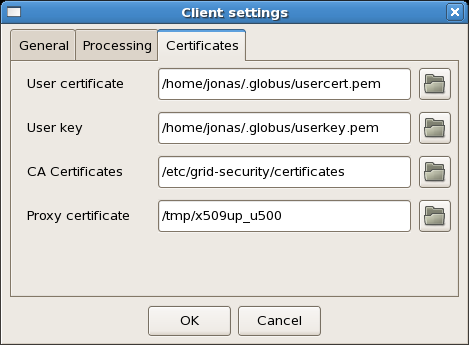
The Certificates tab configures the different directories that are used by the ARC client library. To change a settings enter the directory manually in the text box or use the directory selection box next to the text box.
Note
The certificate directories shouldn’t be changed unless it is really needed.
Default services
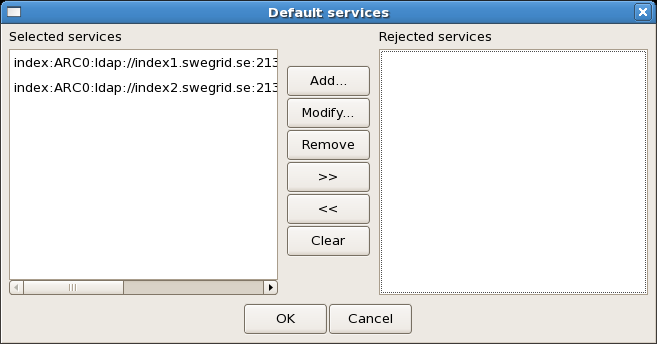
The default services dialog controls what services should be used when querying for resources on the grid. The dialog is divided in 2 parts Selected services, for the services that will be used and Rejected services for those services that should _not_ be includes in the resource discovery.
Adding a service
To add a selected service click on the Add... button. This asks for the url for the service to be added. A service url should be given with the following syntax:
<service_type>:<flavour>:<service_url>
where service_type should be either index or computing. The flavour specifies what middleware plugin to use when contacting the service (e.g. ARC0, ARC1, CREAM, UNICORE, etc.). service_url is the url used when contacting the service.
Modifying an existing service
An existing service can be modified by selecting it in either lists and clicking on Modify.... Modify the url and click OK or Cancel when done.
Removing a service
A service can be removed by selecting in it in either lists and clicking on Remove.
Note
If a service was removed accidentally, cancel the entire dialog by clicking on Cancel.
